In today’s digital landscape, video content reigns supreme. However, large video file sizes can significantly hinder online performance, especially for content creators, regardless of the platform, impacting load times and user experience. If you’re looking to share high-quality videos online without frustrating your audience with buffering or slow downloads, well, you came to the right place. This ultimate guide to reducing video size for online use provides practical, step-by-step technique to achieve smaller sizes while maintaining, or even enhancing, video quality.
In comes Handbrake, the free video transcoder. Now this stat of art freeware can be used for many purposes, one of which is compressing videos using various settings and codecs.
So how does it work?
Technical explanation (You can skip it to the tutorial)
1. Choosing the Right Codec
- H.264 & H.265 (HEVC): HandBrake typically uses efficient video codecs like H.264 (AVC) and H.265 (HEVC) that provide high compression rates without a significant loss of quality. H.265 offers even better compression than H.264, meaning smaller file sizes for the same quality, but it may take more processing power to encode and decode.
2. Adjusting Bitrate
- Constant Quality (RF): HandBrake allows you to adjust the constant quality setting (RF, or Rate Factor), which controls the amount of data used to represent the video. Lower RF values (like 18) keep better quality, while higher RF values (like 28) result in more compression but lower quality.
- Target Bitrate: You can also set a target bitrate, which dictates the average amount of data used per second of video. A lower bitrate reduces file size but can affect quality. HandBrake adjusts the encoding to ensure a balance.
3. Resolution & Frame Rate
- HandBrake allows you to resize the video or adjust its resolution, which significantly impacts the file size. Reducing the resolution from 4K to 1080p or from 1080p to 720p can drastically reduce the file size without a noticeable loss in quality, especially for smaller screens.
- You can also adjust the frame rate (frames per second, or FPS), though this may affect smoothness if reduced too much.
4. Audio Compression
- HandBrake also compresses audio tracks by converting them to more efficient codecs like AAC or MP3. You can adjust the audio bitrate, which helps reduce the overall file size.
5. Multiple Pass Encoding
- Two-pass encoding: HandBrake can perform two-pass encoding, which analyzes the video during the first pass to determine the best way to compress it and then applies the optimal compression during the second pass. This can result in better quality at the same file size.
6. Removing Unnecessary Elements
HandBrake allows you to remove unnecessary tracks (like additional audio languages, subtitles, or extra metadata) to further reduce the file size without affecting the video quality.
Simply you just open Handbrake, add your video(s), play with some settings and press start encode.
Yeah I know, not the best explanations, well let’s get into details with an example.
In our example we’ll be using a video by adege from pixabay (Stunning royalty-free images & royalty-free stock website).

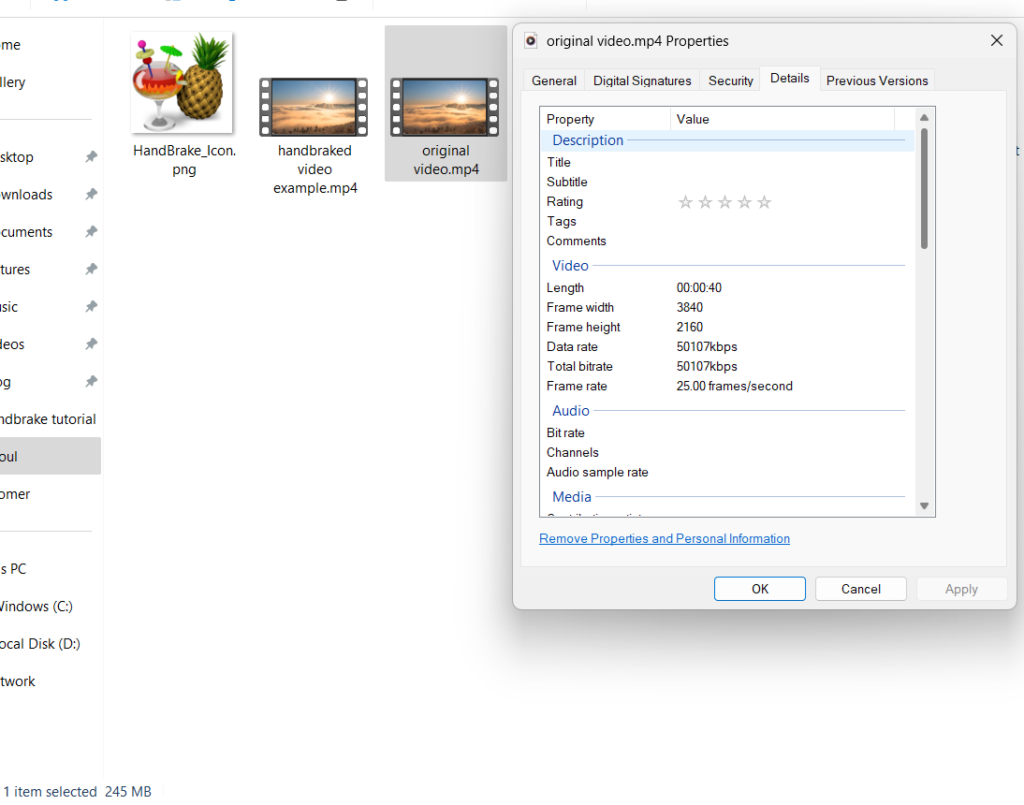
In its original state, the video is 40 seconds long, very high resolution, with low fps, 245 mb in size.
Well, for a 40 seconds videos, that’s a lot. Imagine if it’s a 10 minute video, it would’ve been at least 3 GB in size. Not good, not good at all.
Now let’s open our video in Handbrake and see what can be done about it. 
The picture above is Handbrake’s interface after loading a video to be encode. The most important widget through which we can set the parameters for the best compression is the “Video” widget pointed to by the arrow. You can completely ignore the other widgets (as I do). If you are still curious about the other parameters just check the technical explanation section above. 
Now this is where the real magic happens. The first thing we should pay attention to is the video encoder (1), We have many options to choose from, but the best ones and the most efficient are H.264 & H.265.
The 2nd parameter to look for is the Framerate (2). Basically the higher the Framerates the smoother the video looks. This is a very important for action packed videos. I personally go for 60 or 70 fps with “Constant Framerate” checked, but in our tutorial I decided to go for 120 fps, 6 times fps of the original video.
(3), is the most important parameter, it’s the Quality. The key is to select a value that doesn’t degrade the visual quality in a way that’s noticeable to the human eye. When using the H.264 encoder, I recommend choosing a value between 18 and 22 for optimal results. Feel free to experiment with this range to find the perfect balance between file size and video quality.
After setting all the parameters to our liking we press start encode (4) and let handbrake do its magic.
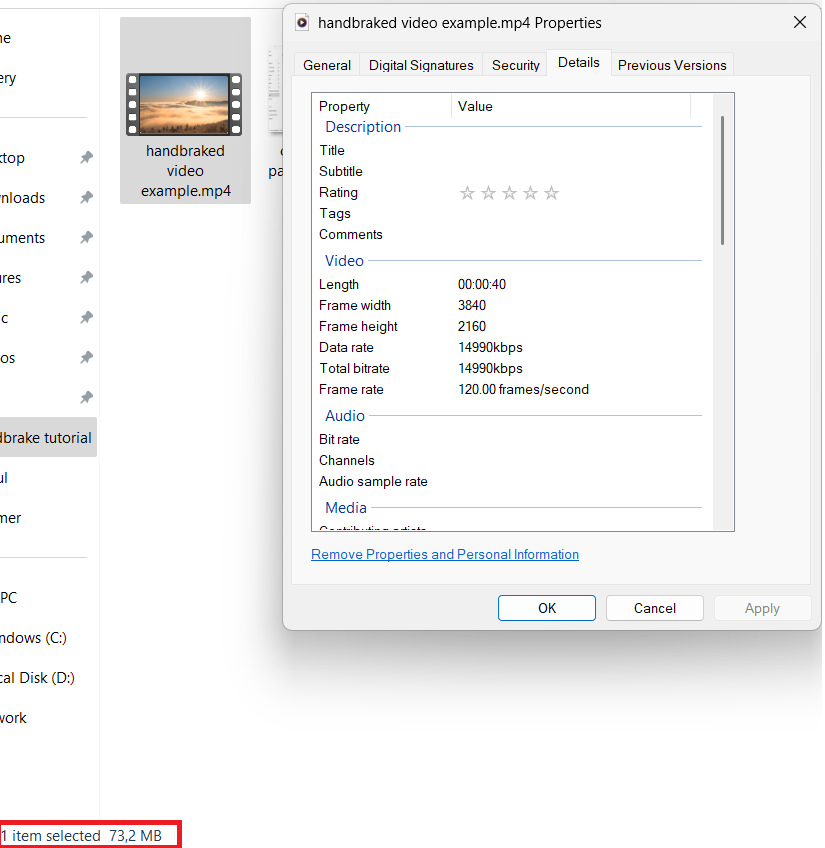
Now let’s check out our video output:
As you see above, The size went from 245 MB to 73 MB, which is 1/3 of it’s original size, with 6 times more framerate, all while maintaining the same quality. Now let’s see how it really looks:
After compression, the results are clear. Despite the significant reduction in file size, the video maintains its original quality, showcasing how effective the compression process was. The improved framerate ensures smoother playback, providing a better viewing experience without sacrificing clarity.
Now if you don’t trust yourself to use the best parameters, don’t worry, I’ll share with you my own personal presets file that I use for my YouTube videos, FOR FREE!!!
How to set up the presets file? easy, just check this short video
That pretty much sums up our tutorial, That pretty much sums up our tutorial on how to reduce video file sizes without compromising quality. By using the right settings in HandBrake you can achieve excellent video compression results, allowing you save storage space while maintaining high-quality playback. Please keep in mind, the best settings depend on your unique needs, so don’t hesitate to experiment and find the perfect balance. Happy compressing!


